My Evaluation
AO1:
The first work I researched was the work of Tim Noble and Sue Webster. These 2 creates sculptures out of junk they found, then they made sculptures of people with them. This is my favourite Tim Noble and Sue Webster image/sculpture. The thing I like about is that they have taken cans and other tall items that have created what appears to be Manhattan. I really enjoyed looking at there photos and they we're my inspiration for my first experiment. The next photographer I looked at was Uta Barth. With Uta Barth I mainly looked at photos that she took of shadows coming into her room. I believe it was a good idea to do this because I had already done man-made shadows, so now I should try natural shadows. The 3rd photographer I looked at was Brassai. The main photos I looked at done by Brassai we're photos he got during the night, some in foggy conditions. A forth and final photographer I looked at was Adam Fuss, I was looking at him for his rayograph work.
Other photographers I had a glance at was Saul Lieter, Paul Strand, Otto Umbehr, William Kentridge, Gregory Crewdson, James Casebere and Minor White
Other photographers I had a glance at was Saul Lieter, Paul Strand, Otto Umbehr, William Kentridge, Gregory Crewdson, James Casebere and Minor White
AO2:
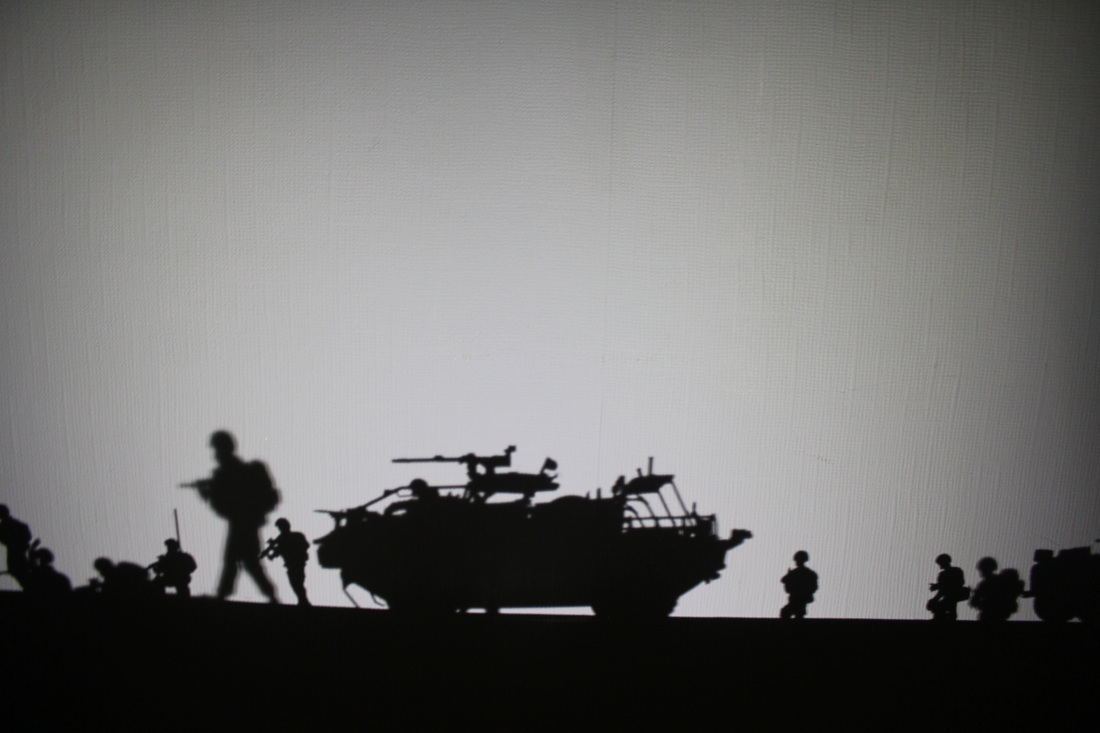
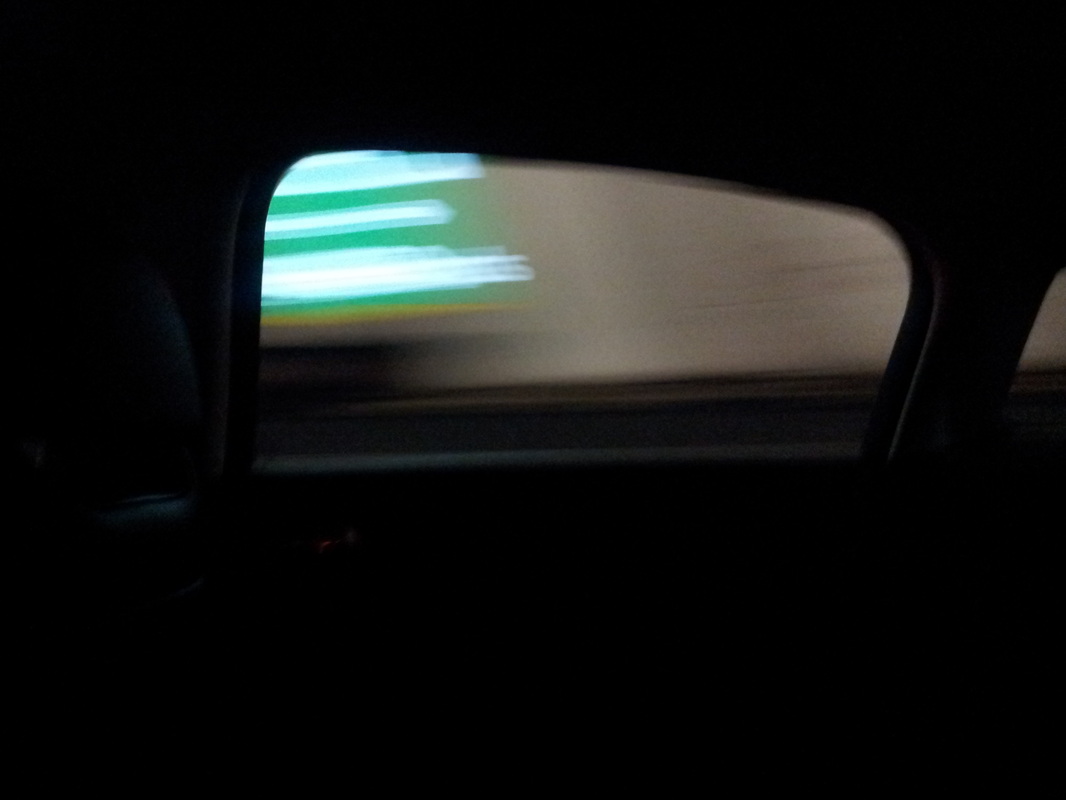
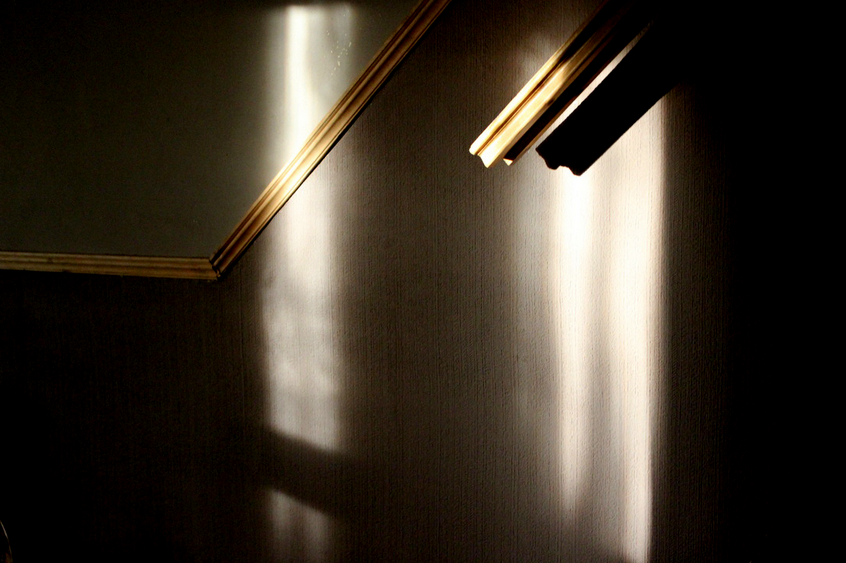
My first experiment I did was man made shadows. I did this with my Airfix model tanks and soldiers. I created the shadows using the torch on my Samsung Galaxy. The room was dark, so there was basically a massive projection of shadows on the wall in my room. This is possibly my favourite photo from the set. There was 1 or 2 photos where I included the objects in the image, to show that my inspiration for the image was Tim Noble and Sue Webster. My second experiment in Creative use of light was silhouettes. The way I did this was hold my phone up against the window, because of the bright outdoors, the colour that was picked out was the outside rather than the inside of the car. As a result this formed a silhouette. This is my favourite one. My next experiment was with shadows inside a house. On days where it was sunny I would let the sun all the way into the room, then I just put a object the sun trail so it was projected onto the wall. At first I took these images on 'Auto' however the next time I took them with 'M' settings, manual. I did this so I could take photos with very fast shutter speeds and very high ISO's. That way the image would come out much darker and the shadow will stand out more. One of the better photos from the set
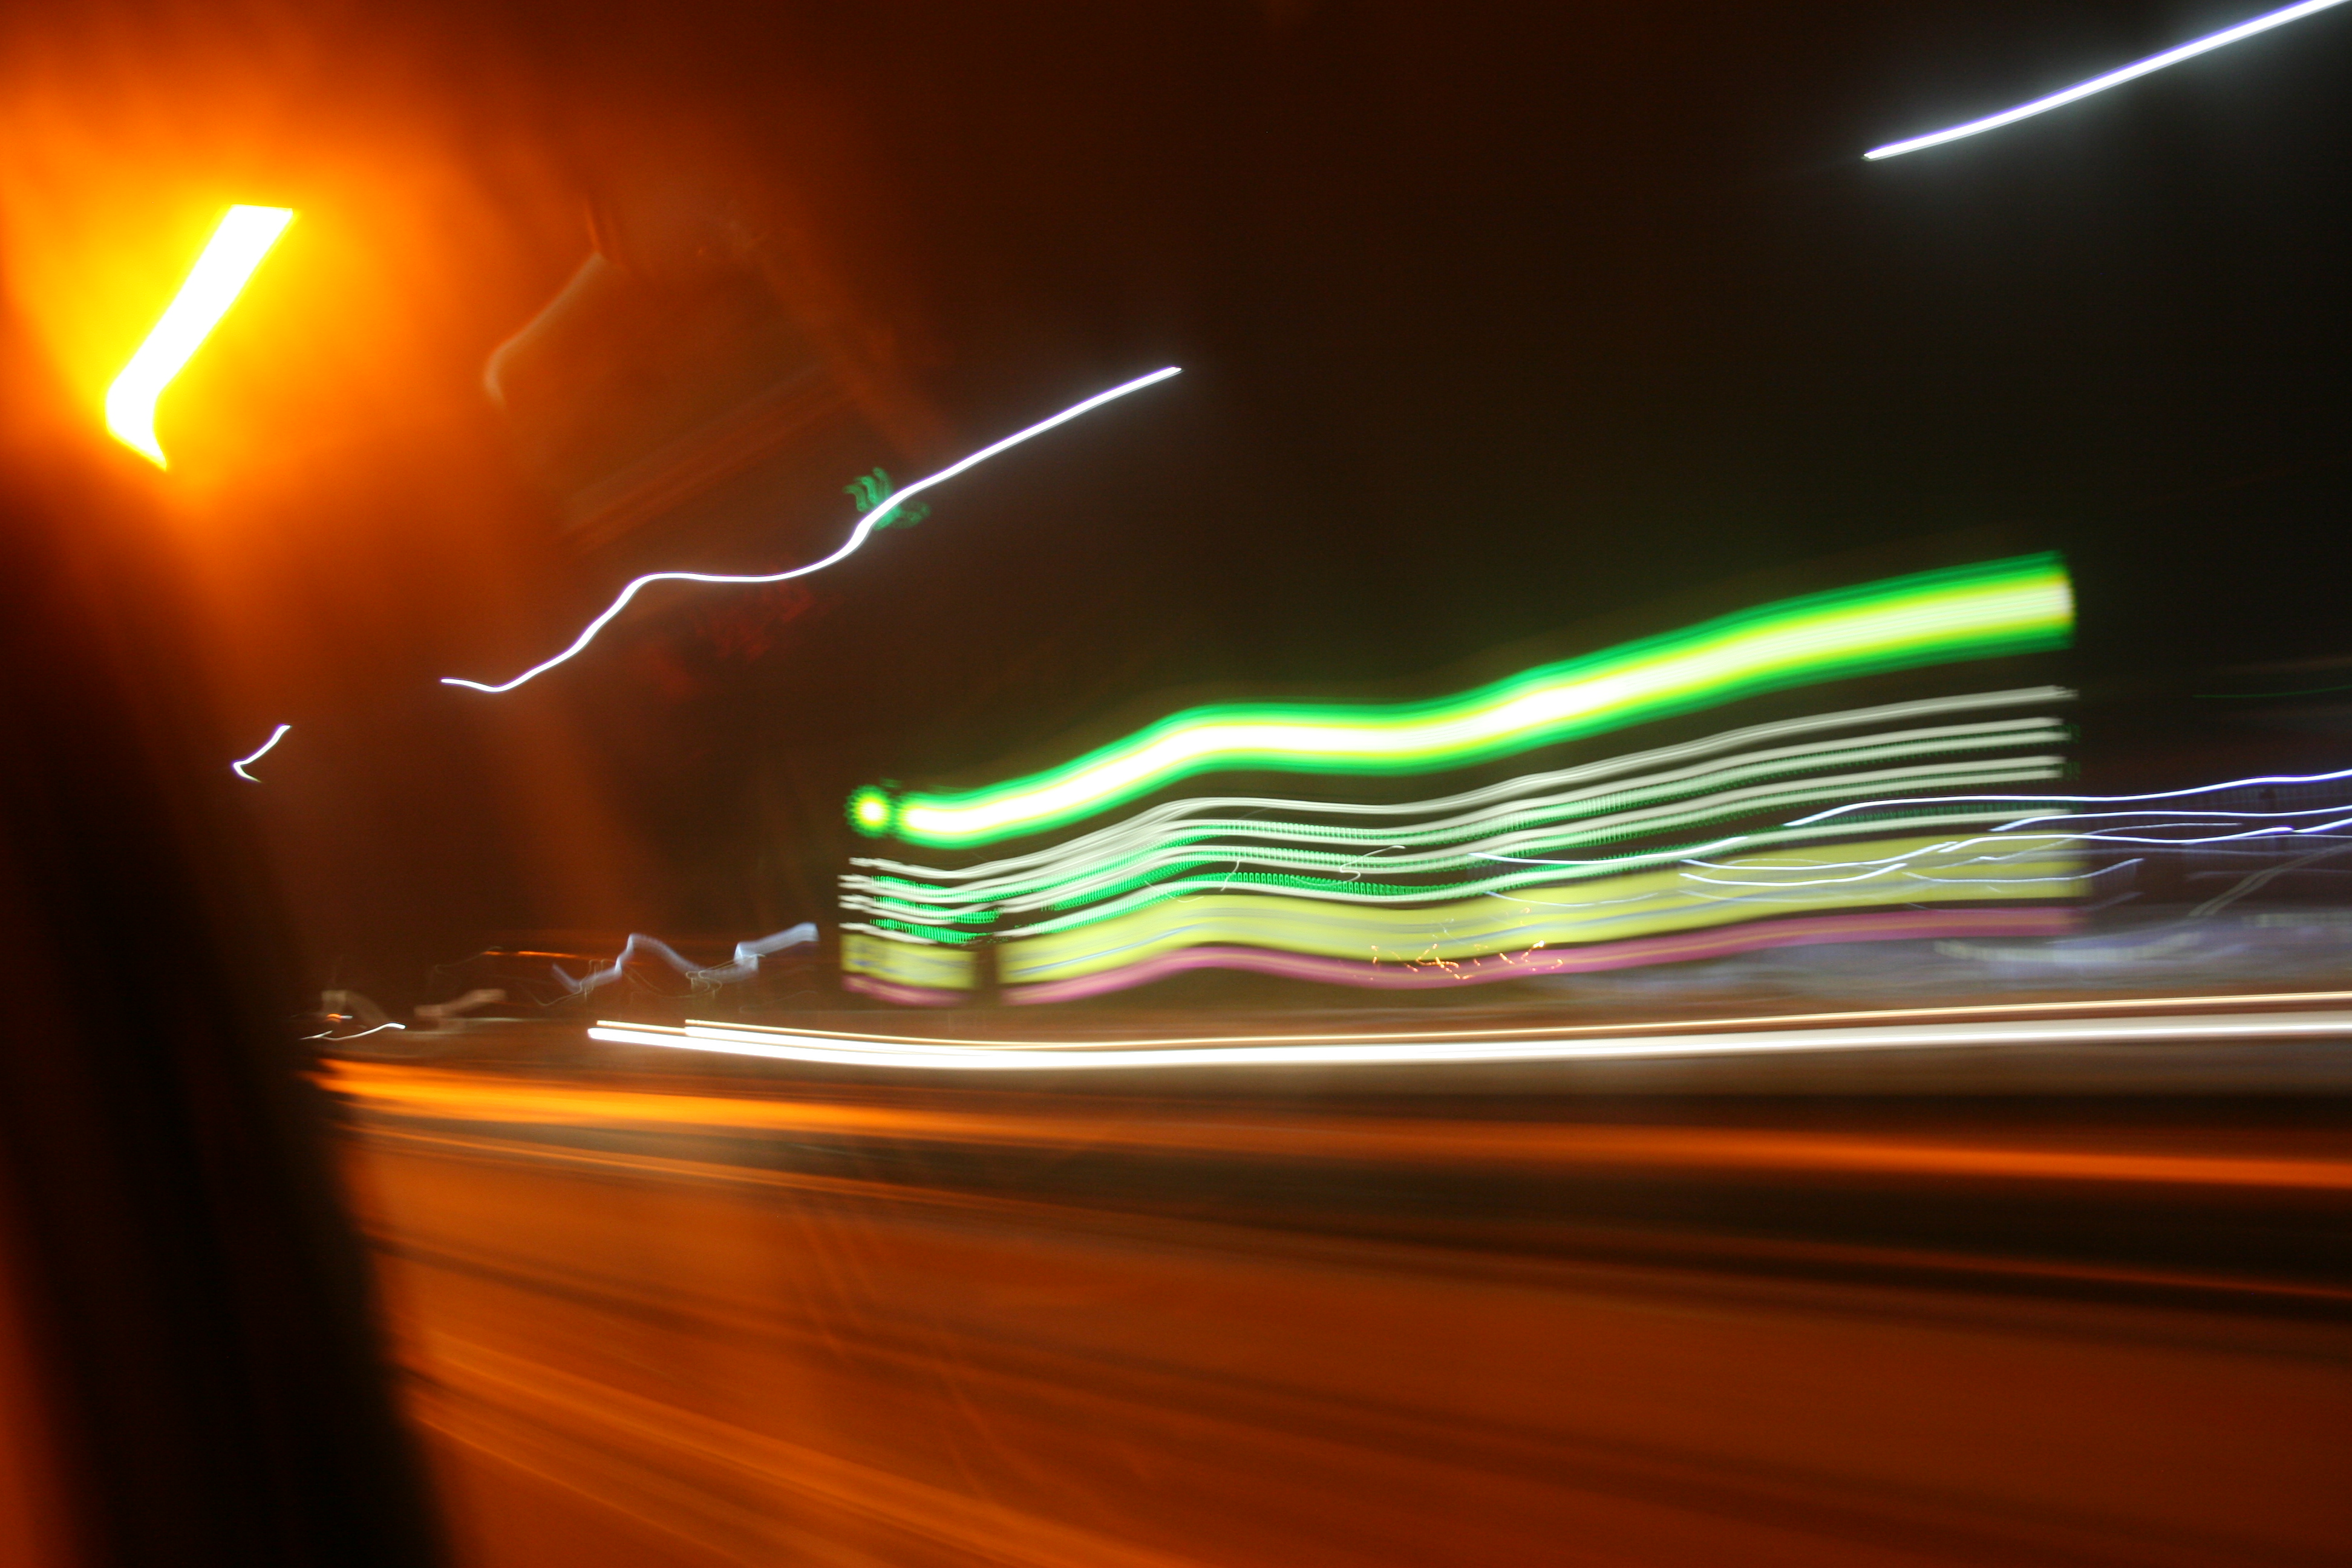
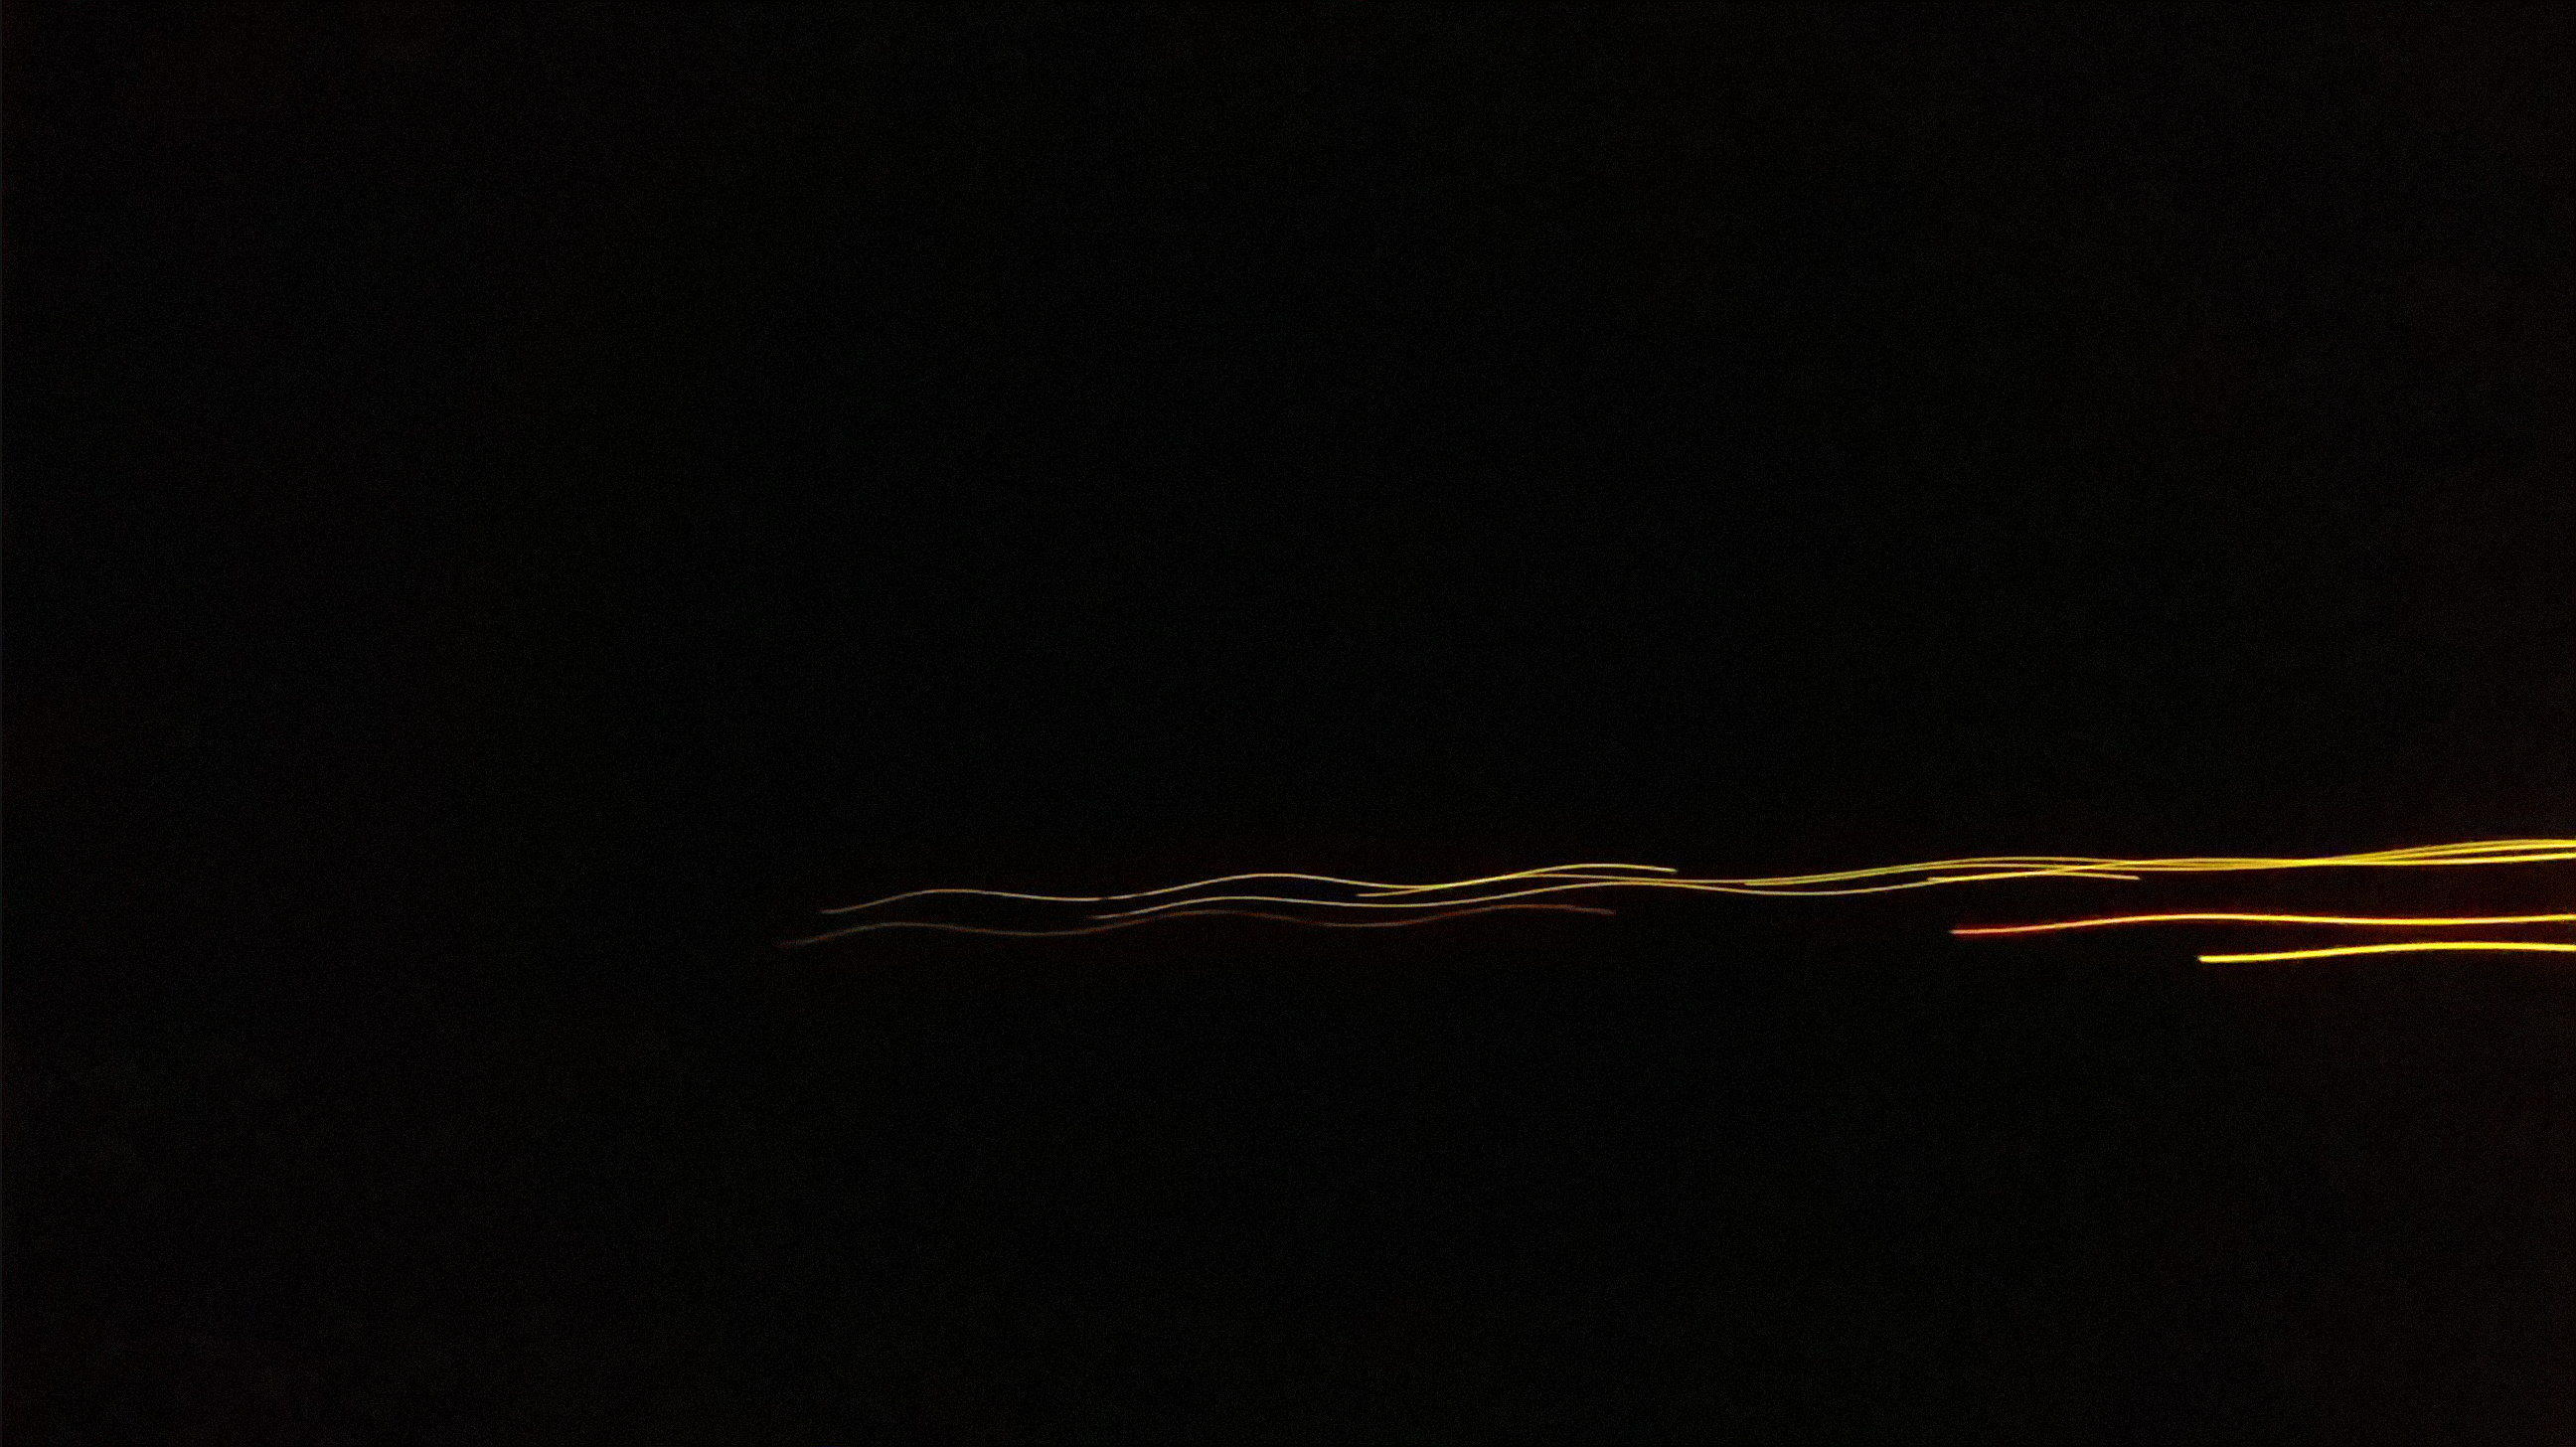
My final experiment, which led to my final piece it involved light trails. I first came up with the idea whilst I was on my way home from Cardiff, it was very dark, so I had an idea of taking photos of light movement. For this I used my Nokia Lumina, I used the small camera to my advantage. The Nokia lumina has got a small resolution, so the camera would only capture light movement rather than an actual image. The composition of the image is down to luck, the reason why is because the shutter only opened on 1/8, so it was done to luck whether I actually got an image of the light, let alone where in the image it is. This idea had great promise for my final piece, however there was 1 problem with it. Nokia Luminas only took images in 5 megapixels. So I retook the images on my Canon 400D. At first I thought this wouldn't' work because the shutter would stay open like a long exposure. I thought that the exposure would take in too much light. However this made the image even better, this is because it took in a great light trail. Canon 400D one, Nokia Lumina one. Another advantage of taking these images with a DSLR was that they were something like 15 megapixels, much bigger than the Nokia one.
Out of all of the photo-shoots I have done. My favourite one is probably the man-made shadows one with the Airfix models. The reason why this was my favourite is because it was combining 2 of my favourite hobbies, I was combing photography and Airfix to make a photo-shoot.
AO3:
For this project I used a medium amount of photographic equipement. Equipement I used included 2 DSLR's [Canon 550D and a Canon 400D], this unit also involved a heavy use of photoshop. For example with both the Light trails and the natural shadows, I had to use photoshop to darken the images. The way I darkened them was by changing the 'Brightness/Contrast' of the image. I mainly used this adjustment to make the subject of the image stand out more. Another thing I did in photoshop was merge images over each other in different ways. The main way I merged them was simply copying and pasting the image over another and changing the opacity of the image. However when it came to mounting these images, Mr Nicholls believed that I need to blend these images together in a different way. The way Mr Nihcolls did it was in Layers and I selected 'Lighten' the image. As a result when I printed off the revamped final piece, the images came out much darker, and formed a much better contrast of colour. One final thing I did in Photoshop was use blur filters. For my final piece, Mr Nicholls came up with the idea of applying a 'motion blur' to apply depth to the image.
AO4:
I'm really happy with this final piece. The first thing I like about the final piece is the fact that the image is filled up. As you can see the light trails are all over the image. This means that there isn't much space left in the image for the black background to form the contrast. The 2nd thing I like about this image is the amount of depth created. This is a weird thing to say seeing on how the image is flat, however depth has been created in this image. The way depth is created is because me and Mr Nicholls applied motion blurs the images at the back of the canvas. This creates a sense of depth to the image. The only thing that I didn't like about this final piece is the execution of the mounting. This final piece had to be mounted twice, the problem with the first one was that I struggled to line the images up with each other, there were air pockets as well underneath the images. So me and Ms Gibson decided we should re print the images and re mount them. This time ms Gibson mounted them and I helped with the layout of the images. This second mounting came out much better than the first one.
